February 23, 2010

Padded external hard drive organiser


My little sister just turned 21. She likes to write stories. She also just lost her primary USB, with data on it which she didn't have saved anywhere else (partly because she had run out of space on her laptop).

From there, the idea for her present blossomed (and then reached fruition very quickly.... ahh, deadlines!)

First of all, I bought her a 320GB external hard drive. I promptly decided that she needed a pretty case to keep it & the cable in, and a pen & pad for spontaneous writing.... I was happy to finally have a project to use my Little Red Riding Hood FQ from Kokka.

I was inspired by all the handy organising rolls I had seen floating around. Here are some links to such tutorials, in no particular order, in case you want to make your own:
I didn't end up using any of them in particular... I just winged it. First of all I played around with some fabric & pins, sketching possible layouts at the same time.


I decided I wanted the hard drive & accessories to sit neatly in a row, whereas I wanted the book to be able to be opened without needing to take it out. I guesstimated some dimensions for all the pieces I'd need.

As I would only have one shot at the cutting & assembling, I took the unprecedented step (for me!) of testing my pattern with some scrap material first (in this case an old sheet). I cut and pinned and uhmed and ahhed and finally adjusted the final pattern piece sizes.


As you can see, I decided to have a huge top flap to stop the hard drive from falling out. I also decided to sew in a layer of bamboo batting to protect it a little bit form bumps and scratches.


My original design had a thin strip of fabric running through the spirals of the book and clipping at the top - this would stop the book from moving around too much. In the end though, the pocket was tight enough that it wasn't necessary.


I had planned to have the roll close using a pair of cute wooden buttons. Two disastrous button-hole attempts later, and I gave up on that idea. Hello, velcro!


Luckily I'd made the closing strap extra long, and I simply trimmed it back after each attempt, folded under the new raw edge and sewed it shut again. Velcro is far easier to use anyway... though it's not as pretty having the extra sew line for it showing on the strap.

Also, sewing the second piece of velcro onto the main part (behind the pocket where the external drive is) was pretty difficult as I'd already sewn everything up. It had to be done mostly by hand.

My sister loved it, and I wouldn't mind having something similar myself. Why is my hard drive roaming around somewhere, getting scratched & losing its cable? Why don't I ever make things for myself? I seem to get most creative when creating for others. And now that I've "done" the external drive case, I'm sure I'll be looking to try something new for my next project....

February 22, 2010

Elegant Morsbag


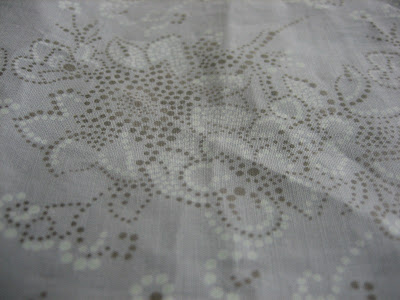
I know I have been posting rather a lot of Morsbags recently, but I just wanted to share this one. It was a gift for a friend's birthday.

For some reason, the fabric & colours remind me of the sort of charming photos that appear on Tiny Happy (or so I'd like to think - check out the link if you haven't already, it's very inspiring).


The fabric is lovely and mildly stretchy. My sister brought it back from Nepal, along with a bunch of other off-cuts left over from clothes she had made for her over there.


Related posts: Morsbags

February 14, 2010

Happy Valentine's day to 15 strangers

The Morsbags crew coordinated a mass handout for Valentine's day. I decided to participate, seeing it as a good excuse to put a dent into the pile fabric I've been acquiring from the local op-shop. And I work so much better to deadlines!

I churned out a whopping 15 bags, which I posted into random letterboxes around my area late last night with a little note saying "Happy Valentine's day" & explaining what Morsbags are. Admittedly, the plan is flawed... who checks their mail on a Sunday?


Here are the bags, neatly stacked up on my desk... which is looking deceptively clean! Note my new pincushion from Ivory Blush Roses & lovely painting from DeadpanAlley... yay!

I spend a lot of time at this desk, with Uni work spread out everywhere one day, and then my trusty sewing machine out the next. As you can imagine, I spend a lot of time unpacking things and packing them back up. I look forward to the day when I might have a dedicated sliver of space for arty crafty activities!


So does my housemate, I'm sure, as from time to time our living room becomes an extension of my workshop. (Note the lovely retro red pincushion I bought from Ginpins...)

Most of the bags I made were from old pillow cases, but I made a few more from tea-towels.


I ended up making another bag from a horse tea towel, extending it with the same fabric I used for Eugene's body! The handles were sourced from a pillowcase.


The other tea-towel bag features Australian wattle and is "extended" at the top rather than the bottom. This one will actually be sent to someone overseas (via sendsomething) rather than put into a local letterbox.

I wish you all a lovely Sunday, whatever you have planned!


Related posts: Morsbags, Recycling old pillowcases into Morsbags, Morsbags from tea towels, Pin cushion from Ivory Blush Roses, Eugene wants a hug

February 11, 2010

Magazine Collage ATCs


Hot on the heels of my junk mail collages, I participated in a Magazine Collage ATC Swap over on swap-bot.

I spent a while poring over old Frankie Magazines to find inspiration, which wasn't hard because it's full of cute and quirky backgrounds, drawings, photos & articles :)

The process went something like this:
  1. Rip out magazine pages with interesting pics
  2. Carefully cut out around individual pics with an exacto knife & cut out various background prints
  3. Spend an hour or so rearranging all the little pieces around on a blank ATC until happy with the arangement
  4. Desperately try and glue all the pieces down whilst keeping them in place
  5. Look at all the bits and pieces which didn't make the cut... and repeat steps 3&4
As you can see in the pics above, I actually cut out an ATC-sized piece from the magazine's cover to use as the 'blank' canvas.


And we all know I'm a sucker for coordination, so the card & envelope also had to be made from Frankie magazine cut-outs!


February 8, 2010

Pin cushion from Ivory Blush Roses


During the great lucky streak of '09, I picked up this gorgeous pin cushion from a give-away over at Ivory Blush Roses. I love it & use it all the time... it's a great size & the colours remind me of a grassy knoll. So cute!

She has a great tutorial on how to make your own pincushions, using CDs as bases! I love the fact that old CDs have been used in this piece, and have a secret urge to peek inside and see what CDs are in there.

I first stumbled upon Ivory Blush Roses through her crazy quilting.


This jellyfish, in particular, tickled my fancy!


I like the chocolate creams in this piece too. There are many many more examples of crazy-quilted blocks over on her site.

Other lovely photographs from her site include:


Yarn that looks good enough to eat, and...


...sweet collections like the crocks and shells pictured above.

If you pop over to say hi, don't forget to check out her other tutorials too!

February 4, 2010

Dhal with a twist


I like dhal. It's a tasty, colourful, cheap, nutritious, easy, dish to make. I prefer to make it as a side for curries, veg, etc., but sometimes I'm too tired or lazy to cook more than one dish.

Dhal with rice can be a touch on the bland side, so I was delighted to see that Vegan Dad had posted a recipe for dhal with a twist: Tarka Dhal.

Now my photo looks pretty different to his, and I did adjust the recipe slightly.

I didn't have sweet onions, so I just used a red onion and added a teaspoon of brown sugar to take the edge off its taste. I also added a teaspoon of chilli flakes to the tomato mixture. It was super punchy, so I didn't miss the garam masala which I usually add to dhal :)

February 3, 2010

Red lemur bag!


This bag was dreamt up as an entry for the Morsbag forum's Animal morsbag competition. Life got in the way, and I hadn't even started it when the competition finished. It didn't stop me making it anyway... after all, I'd already sketched it out and chosen the fabrics!


And here's the sketch. After cutting out the red fluffy bits for the sides of the face, I realised how unevenly sized they were... just like in the sketch! Something to remember if you just plan on enlarging & cutting out a hand-sketched pattern without thinking about it too much. Make sure it's right first!

Why a Lemur? I wanted to do something red and fluffy, as I have a stash of bright red fake fur. I was originally going to make an orang-outang bag, but after looking at many cute photos, I settled on a red lemur instead.

Shared under a cc-by license
{source: photojenni}

Something about those eyes!

I started by making the face out of felt. I then cut out each layer of the body and blanket stitched everything together (with a trip of orange felt between the edges of body pieces to make them stand out a little more).

This furry felty lemur was quite heavy, and I was worried that the bag would hang to one side and sag at the front. Especially since the spotty fabric was old thin stuff I'd picked up at the local op-shop! This was exacerbated by the fact that the design had it sitting to one side of the bag (so that the tail could be the handle! Yay!). I ended modifying the original Morsbag pattern by adding a layer of bamboo batting & lining it with more spotty fabric inside. It doesn't hang lopsidedly at all.

I think the end result is part cute, part craftastrophe... Suffice to say, it doesn't see the outside of the house much! We hang it off a doorknob to keep all our other cloth shopping bags in and to startle unsuspecting guests!


Related posts: Morsbags
Related Posts Plugin for WordPress, Blogger...